
Inventory Transfers Tab
Manager Menu-Tabs > Inventory/Products Tabs > Inventory Transfers Tab

Inventory Settings - Locations
Businesses that keep inventory at more than one store or warehouse may need to track availability by geographic location. Manager can do this with inventory locations.
Establish inventory locations
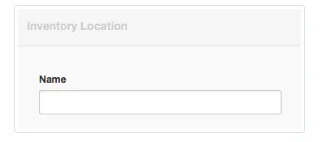
To establish locations, go to Settings and click Inventory Locations, then New Inventory Location:

Enter the location’s name:
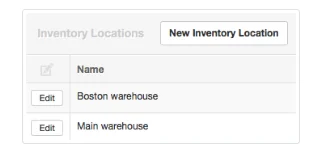
Click Create. The location will appear in the list of locations:
Note
By default, all inventory items in Manager are in an automatic location named Unspecified. This location cannot be edited or deleted and does not appear in the list of inventory locations. But inventory items can be transferred from it to other locations in the Inventory Transfers tab.
By default, all inventory items in Manager are in an automatic location named Unspecified. This location cannot be edited or deleted and does not appear in the list of inventory locations. But inventory items can be transferred from it to other locations in the Inventory Transfers tab.
A field for Location will appear in sales and purchase transaction forms:
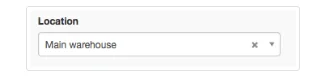
Use this field to select the location from or to which the inventory item will be shipped or received.
Note
If the Delivery Notes or Goods Receipts tabs are enabled, the Location field will be disabled. Goods shipments and receipts must then be entered with delivery notes and goods receipts to track inventory item quantities to their correct locations. Think carefully before enabling those tabs, because they impose considerable additional work.
If the Delivery Notes or Goods Receipts tabs are enabled, the Location field will be disabled. Goods shipments and receipts must then be entered with delivery notes and goods receipts to track inventory item quantities to their correct locations. Think carefully before enabling those tabs, because they impose considerable additional work.
Inactivate inventory locations
When an inventory location is no longer necessary, it can be inactivated and will no longer appear in menus. Click Edit for the location. Since the location has already been created, a checkbox appears to make the location Inactive. Check the box:
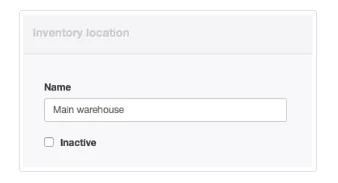
If the location becomes active again, simply uncheck the box. In either case, click Update to save the change.
Inventory Transfers Tab
Inventory transfers are used to record movement of physical inventory items from one location to another without a sale or purchase being involved. They are completely optional, and can only be used when at least two inventory locations have been defined (see Notes below). Inventory locations are created as described earlier.
Example
Sanjay’s Drum and Guitar Shop has a small retail display showroom. Because of limited space, Sanjay also rents a warehouse in a nearby industrial park where he stores most of his inventory. Sanjay creates two inventory locations: Retail store and Warehouse. As he sells items from the showroom, he brings inventory from the warehouse to replace them. He uses inventory transfers to record the movements.
Now, if a customer wants more of an item than he has in the showroom, Sanjay can look up his full stock level and see not just how many he has in total, but how many are at each location. He can avoid ordering more until he really needs to, and can make the sale immediately (arranging to deliver from the warehouse), even though he cannot physically see his inventory.
Notes
One location automatically exists for all businesses with inventory: Unspecified location. Until transfers or purchases add inventory to other locations, all inventory items will be located at Unspecified location. Therefore, when inventory locations are first implemented, items must be counted and assigned to their correct locations. Make these assignments using inventory transfers.
Inventory items themselves are not associated with any specific inventory location, because they can be moved from one to another. Quantities at various locations are determined by the net result of purchases, sales, write-offs, and transfers, not according to item identity.
Enable the Inventory Transfers tab
To use inventory transfers, enable the Inventory Transfers tab. Click Customize below the left navigation pane, check the box for Inventory Transfers, and click Update below the list:
Enter the inventory transfer In the Inventory Transfers tab, click New Inventory Transfer:

Complete the form:
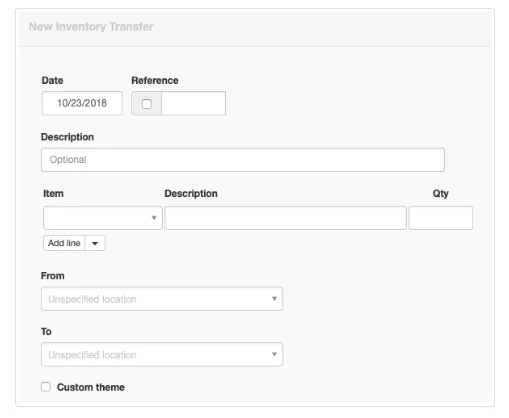
- Date will show today’s date by default. This may be edited.
- Reference can be used for any internal or external sequence. If the box within the field is checked, Manager locates the highest-numbered existing inventory transfer and adds 1 to its Reference number.
- The first, summary Description is optional, allowing you to describe the transfer in general terms.
- Item allows you to select the inventory item by item code or item name.
- The second and all subsequent Description fields will prefill from inventory items’ definitions, if they exist. Or descriptions can be entered manually.
- Qty is the number of inventory items being transferred.
- From is the origin location. Unspecified location is the default.
- To is the destination location. Again, Unspecified location is the default.
Click Create to record the transfer. Inventory quantities at both locations will be adjusted automatically.
Caution
Remember that the inventory transfer form only records the movement of inventory. Unless you move the proper number of items from one location to another, and unless those locations are correct, physical inventory counts will be off and reconciliation may be very difficult.
Remember that the inventory transfer form only records the movement of inventory. Unless you move the proper number of items from one location to another, and unless those locations are correct, physical inventory counts will be off and reconciliation may be very difficult.