
Suppliers Tab
Manager Menu-Tabs > Purchase Tabs > Suppliers Tab

Supplier Tab sets up and maintains suppliers records.
A Supplier is an entity (person, business, or other organization) with whom you have or plan to have an Accounts payable relationship. Suppliers are actually subaccounts of Accounts payable. You must first create a Supplier before you can:
- Enter a purchase invoice and buy on credit
- Record payments made to suppliers
- Create a supplier statement showing balances due or summarizing past transactions
- Issue a request for quotation
- Generate a purchase order
- Issue a debit memo for returns of goods
- Track your complete purchase and payment history with another entity
Tasks Performed:
- Maintains a Supplier Master File that contains the following supplier information (fields):
NameCodeCredit limitCurrency (if activated)AddressDivision (if activated)Control Account (if activated)Starting balance
Note
Manager also allows you to add your own Custom Fields
Suppliers can be added, changed (edited), viewed, deleted, printed, or made inactive.
Not everyone from whom you buy must necessarily be a Supplier. You can make a cash purchase involving immediate payment without creating a Supplier simply by entering a name as Payee when making a payment from a bank or cash account. But such transactions will not be recorded in a history for that Payee, even if the Payee is already defined as a Supplier. Examples of purchases where a Supplier might not be needed include:
- Purchases by cash or check from a merchant
- Timely payment of monthly utility bills
- Credit card payments for business expenses
Enable the Suppliers tab
To enable the Suppliers tab, click Customize below the left navigation pane, check the box for Suppliers, and click Update below the list.

Create a Supplier
Select the Suppliers tab, then click the New Supplier button:

Complete the entry form. This information will appear on purchase invoices and similar documents:
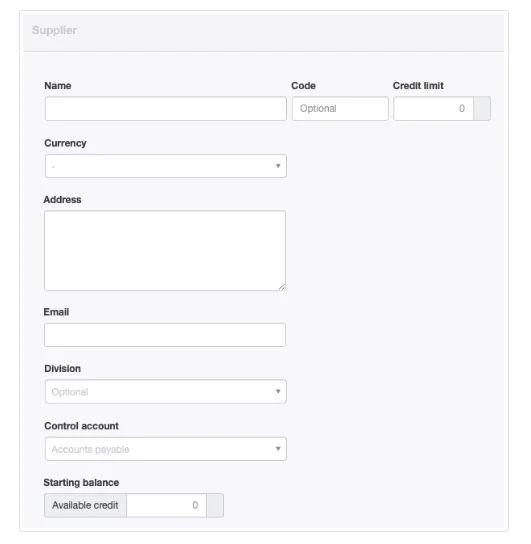
- Name is the legal name of the supplier
- Code is a short alphabetic or numeric designation of your supplier.
- Credit limit is optional, but can be filled in if the supplier has limited how much credit it will extend to you. If a limit is entered, Manager will track and display remaining, available credit in the Suppliers tab listing.
- Currency in which the supplier operates can be selected if any foreign currencies have been set for the business. Transactions for the supplier will be denominated in the designated currency. Otherwise, the supplier will be denominated in the base currency.
- Address should be the mailing address of the supplier.
- Email is where documents will be emailed from within the program.
- Division appears if any divisions are defined for the business. A supplier can be allocated to a single division. Or this field can be left blank for suppliers usable by the entire business.
- Control account can be selected if any custom control accounts for suppliers are defined. Otherwise, the field does not appear and the supplier is assigned to the default Accounts payable control account.
Note: Starting Balances are no longer entered using this form.
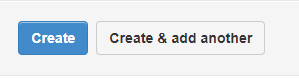
Click Create to save the supplier. Your supplier will now appear in the Suppliers tab.
Note
After adding your first supplier, the automatic liability Control Account Accounts payable is also activated.
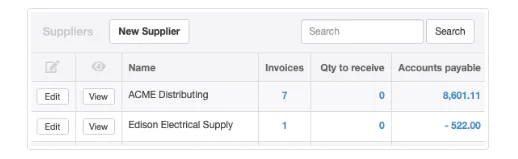
Suppliers are listed in alphabetical order according to their names. Use scrolling, paging, and search functions to find them. The listing shows the number of purchase invoices created for a supplier and the supplier’s Accounts payable balance. Other columns may appear, depending on tabs in use and setup of custom fields. Click on blue numbers for more details of any column.
Note
As in the illustration above, a supplier can have a negative balance in Accounts payable. This indicates that the supplier owes you money. For example, you may have returned goods without yet being reimbursed.
Edit or Add Supplier Information
Edit or add supplier information in the Suppliers tab after clicking the Edit button next to a supplier’s name.
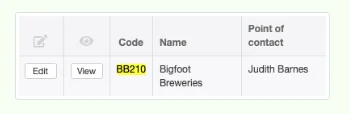
For example, add a Code to make suppliers easier to find or distinguish from other suppliers with identical names. Codes will appear in the Suppliers tab listing if any are present:
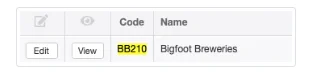
Codes can appear on completed forms after the supplier’s name. To see codes on forms, follow instructions in this Guide.
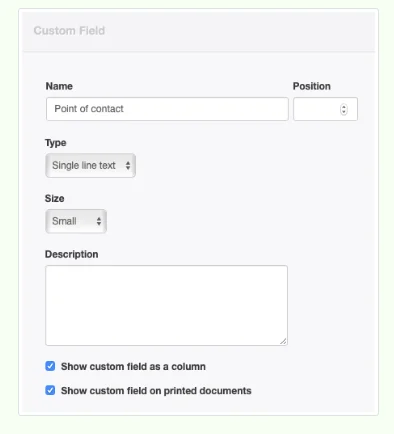
You can also add custom fields for other information about your suppliers. Under Settings, click Custom Fields and locate the list for suppliers. Click New Custom Field:

Define your custom field. Checkboxes allow you to specify whether the custom field will show as a column in the Suppliers tab list and on printed documents.
Example
You can add a custom field for a point of contact at your supplier:
The results appear as below in the Suppliers tab listing:
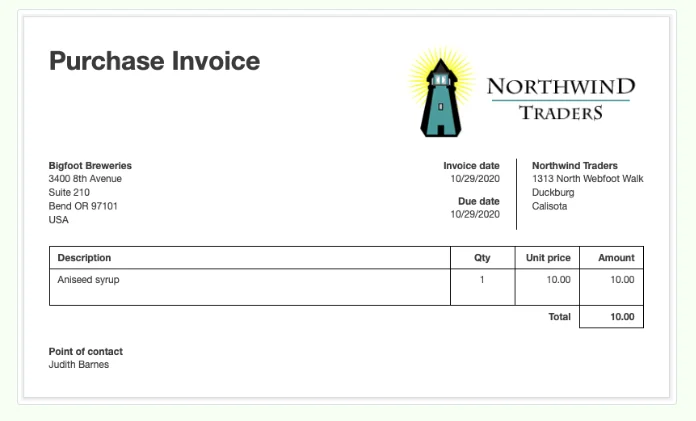
and on a purchase invoice:
Inactive Suppliers
Old, inactive Suppliers can clog your lists. You can delete them if you have never entered any type of transaction for them.
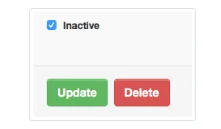
Edit the Supplier and click Delete at the bottom of the screen. But if you have entered any transactions, Manager will not allow you to delete a Supplier, because doing so would also delete all related transactions. Instead, you can make a Supplier inactive.
Edit the Supplier and check the Inactive box. Click Update and the Supplier will no longer appear in active lists:
If the Supplier ever returns to active status, scroll to the bottom of the suppliers list, where you will see the Supplier’s name in light grey text. Click Edit next to the Supplier’s name:

Uncheck the Inactive box and click Update.